How to Increase Landing Page Conversion Rate for Travel Agencies 📈
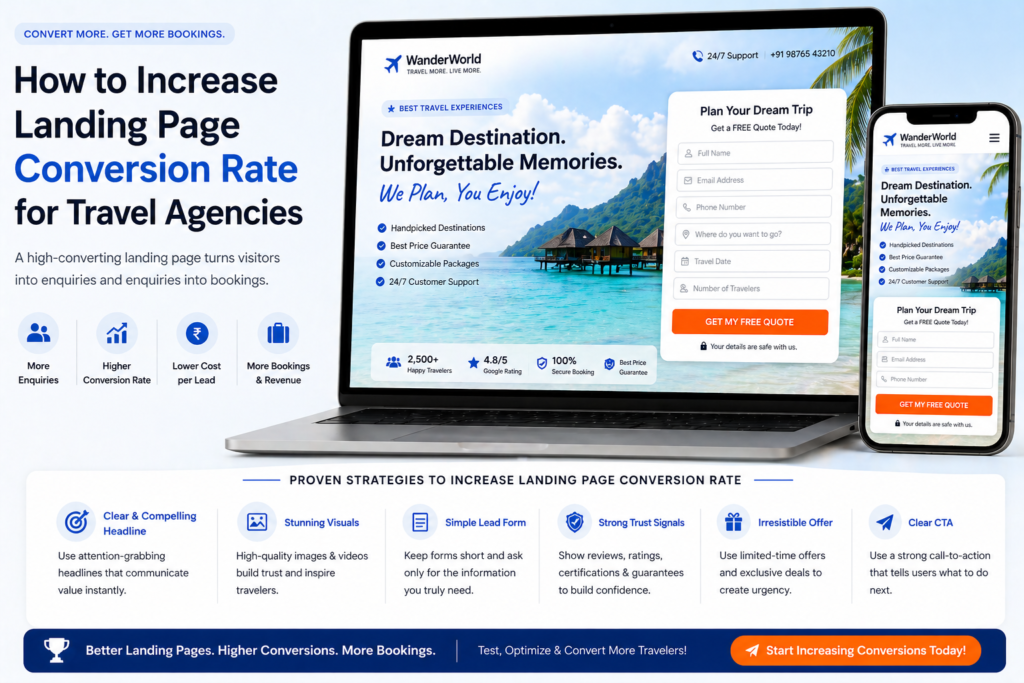
💡 Summary A small improvement in your landing page conversion rate can have a bigger impact on your bookings than doubling your ad spend. In this guide, I’ll show you exactly how to increase the conversion rate of your travel agency landing pages — using a systematic, data-driven approach covering page speed, form optimisation, social proof, A/B testing, and the quick wins that deliver results fastest.
Here’s a number worth sitting with: the average landing page conversion rate across industries is around 2.35%. The top 25% of landing pages convert at 5.31% or above. The top 10% convert at 11.45% or higher.
That gap isn’t explained by better ads or bigger budgets. It’s explained by better landing pages.
For a travel agency receiving 500 visitors per month to a landing page, the difference between a 2% and a 5% conversion rate is the difference between 10 enquiries and 25 enquiries per month — from exactly the same traffic. Without spending an extra penny on advertising.
Increasing your landing page conversion rate is the highest-leverage activity in your entire marketing operation. This guide shows you exactly how to do it — systematically, measurably, and in order of impact. 👇
Start Here: Measure Before You Optimise
The single most important rule of conversion rate optimisation (CRO) is this: never make changes based on opinion. Make them based on data.
Before changing anything on your landing page, set up proper measurement so you know your current baseline and can accurately measure the impact of every change you make.
The Measurement Stack Every Travel Agency Needs
Google Analytics 4 (free) Set up GA4 on your website if you haven’t already. Create a conversion event for every form submission on your landing pages. This gives you:
- Total form submissions per page
- Conversion rate by traffic source (Google Ads vs organic vs social)
- Bounce rate and time on page
- Device breakdown (mobile vs desktop vs tablet)
Google Search Console (free) For organic landing pages, Search Console shows you exactly which queries brought visitors to each page, your click-through rate from Google, and your average position in search results.
Hotjar or Microsoft Clarity (free) These tools record visitor sessions and generate heatmaps showing exactly where people click, how far they scroll, and where they drop off. This is where you discover why your conversion rate is what it is — not just what it is.
Install all three before making any changes. Run them for at least 2 weeks to collect meaningful data. Then use what you find to prioritise your optimisation efforts.
Step 1: Fix the Conversion Killers First
Before testing or experimenting, identify and fix the issues that are actively destroying your conversion rate. These are problems, not opportunities — and they need to be resolved before anything else.
Conversion Killer #1: Slow Page Speed
Page speed is the single most impactful technical factor on conversion rate. Research from Google shows that as page load time increases from 1 second to 3 seconds, the probability of a visitor bouncing increases by 32%. From 1 to 5 seconds, it increases by 90%.
Travel landing pages are particularly vulnerable because they’re image-heavy.
How to diagnose: Run your landing page through Google PageSpeed Insights (pagespeed.web.dev). A mobile score below 60 is a serious problem. Between 60–80 is improvable. Above 80 is acceptable.
How to fix:
- Compress all images using TinyPNG or ShortPixel — this alone typically improves scores by 10–20 points
- Enable lazy loading for below-fold images
- Reduce or remove unnecessary plugins (WordPress)
- Upgrade to faster hosting if your server response time is above 200ms
- Use a CDN (content delivery network) to serve assets from servers closer to your visitors
A page speed fix is rarely glamorous, but it consistently delivers one of the highest conversion rate lifts of any CRO intervention.
Conversion Killer #2: Broken or Poorly Functioning Forms
A form that doesn’t work is an invisible conversion killer — visitors who want to enquire simply can’t. And most don’t report it; they just leave.
How to diagnose:
- Submit a test enquiry on every device (desktop, iPhone, Android) and every browser (Chrome, Safari, Firefox)
- Check that the confirmation email is triggered immediately
- Check that the form submission is recorded in your analytics
- Check that required field validation works correctly (it should prevent submission but not in a confusing way)
How to fix: Fix any technical issues immediately. Then review the form UX: are error messages clear? Does the form reset after submission? Does the thank you page load correctly?
Conversion Killer #3: No Clear CTA Above the Fold
If your primary call-to-action isn’t visible without scrolling, a large percentage of visitors who arrived ready to enquire will leave without finding it.
How to diagnose: View your landing page on your phone. Can you see a clear CTA button or enquiry form without scrolling? If not, this is a problem.
How to fix: Restructure your hero section so the CTA is visible above the fold on all devices. On mobile, this often means reducing hero image height and ensuring the form or button is in the top 600px of the page.
Conversion Killer #4: Message Mismatch
If visitors arriving from a “Maldives honeymoon specialist” ad land on a generic holidays page, they’ll leave immediately — even if your page is otherwise well-designed.
How to diagnose: Check the traffic source breakdown in GA4. If paid traffic has a significantly higher bounce rate than organic traffic, message mismatch is almost certainly the cause.
How to fix: Create dedicated, message-matched landing pages for each major campaign. The headline and hero image should directly reflect the ad that sent the visitor there. As covered in our guide on landing page best practices for travel agencies, message match is the single highest-impact landing page improvement most agencies can make.
Step 2: The Quick Wins — High Impact, Low Effort
Once conversion killers are fixed, focus on the changes that deliver the highest conversion lift for the least effort.
Quick Win #1: Rewrite Your Headline
Your headline is the highest-leverage element on the page. A headline that speaks directly to the visitor’s desired outcome — “Tailor-Made Maldives Honeymoons — Free Itinerary Within 24 Hours” — consistently outperforms a generic agency-focused headline by 2–4x.
If you haven’t already rewritten your headline using the formulas in our landing page copy guide, do that first. It’s the fastest conversion rate improvement available to most travel agencies.
Quick Win #2: Change Your CTA Button Text
“Submit” is the worst possible CTA button text. It’s passive, cold, and tells the visitor nothing about what happens next.
Replace it with outcome-oriented language:
- “Get My Free Itinerary”
- “Start Planning My Trip”
- “Speak to a Specialist”
- “Request My Free Quote”
This change takes 60 seconds and consistently lifts click-through rates on the form button by 10–25%.
Quick Win #3: Add a “What Happens Next” Statement
Directly beneath your form submit button, add a single sentence explaining what happens after submission:
“You’ll receive an immediate confirmation, then a personalised itinerary from one of our specialists within 24 hours — completely free, no obligation to book.”
This removes uncertainty at the moment of maximum hesitation. It’s one of the simplest additions to a travel landing page and one of the most consistently effective.
Quick Win #4: Add Social Proof Adjacent to the Form
If your testimonials are currently at the bottom of the page, move at least one strong, specific testimonial to a position immediately above or beside the enquiry form.
Visitors are most hesitant at the exact moment they’re deciding whether to submit. A compelling review from a real customer at that precise location reduces hesitation and lifts form completion rates.
Quick Win #5: Display Your Phone Number Prominently
Many high-value travel customers — particularly for bookings over £5,000 — want to speak to a human before committing to an enquiry. If your phone number is buried in the footer, you’re losing these customers.
Add your phone number to the header and make it click-to-call on mobile. This typically lifts overall enquiry rate (calls + forms combined) by 15–30% for high-value travel landing pages.
Step 3: Form Optimisation — The Highest-Impact Structural Change
Enquiry form optimisation is consistently the single highest-impact structural change you can make to a travel landing page. The form is where conversion happens — or doesn’t.
Reduce Field Count
Start by auditing every field on your current form. For each one, ask: “Do I actually need this to start a conversation, or am I collecting it for my own convenience?”
Most travel agency forms ask for far more than necessary. The data is clear: reducing from 8–10 fields to 4–6 fields typically increases form completion rates by 30–50%.
Keep:
- First name
- Email address
- Phone number (optional)
- Destination of interest
- Approximate travel dates
Move to the follow-up conversation:
- Number of travellers
- Departure airport
- Accommodation preferences
- Specific resort requests
- How they heard about you
Test Single-Step vs Multi-Step Forms
A multi-step form breaks the enquiry process into 2–3 shorter steps, showing only 2–3 fields at a time rather than the full form at once.
Why multi-step forms often convert better:
- The initial ask feels smaller (“just your name and email to start”)
- Once someone has completed step 1, they’re more likely to complete step 2 (commitment and consistency principle)
- Progress indicators (“Step 1 of 2”) make the process feel manageable
Multi-step forms work particularly well for mobile visitors and for higher-friction enquiries (luxury travel, complex itineraries). Test a multi-step version against your current single-step form — many travel agencies see 20–40% higher completion rates.
Use Conditional Logic
If your form builder supports it, use conditional logic to show different follow-up questions based on the visitor’s answers.
For example: if a visitor selects “Honeymoon” as their trip type, show a “Approximate wedding date” field. If they select “Family Holiday”, show a “Ages of children” field instead.
This makes the form feel more personalised and relevant — and means you’re only asking questions that are genuinely applicable to that specific visitor.
Step 4: Social Proof Optimisation
Social proof is one of the most powerful conversion levers available — but it only works if it’s the right type of proof, positioned correctly, and presented credibly.
Audit Your Current Social Proof
Look critically at the testimonials currently on your landing page and ask:
- Are they specific? (“We planned an incredible Maldives honeymoon” is specific. “Great service!” is not.)
- Are they recent? A testimonial from 2020 feels stale in 2026.
- Do they include a full name, destination, and trip date?
- Do they feature a customer photo (with permission)?
- Are they positioned near the form, or buried at the bottom?
What Converts Best: Specificity Hierarchy
Based on consistent CRO research, here’s the social proof hierarchy for travel landing pages — most to least powerful:
- Video testimonials — even selfie-style, unpolished videos from real customers outperform everything else
- Photo + detailed written testimonial — real customer photo, full name, specific trip details
- Written testimonial with trip details — no photo but specific, credible, and dated
- Independently verified rating — Trustpilot widget or Google review badge with live review count
- Generic star rating — the least effective; only use if you have nothing better
The Review Count Formula
When displaying your overall rating, add context that makes the number meaningful:
Weak: ⭐⭐⭐⭐⭐ Strong: “Rated 4.9/5 by 627 travellers — 96% say they’d recommend us”
The second version is more credible and more compelling because it’s specific.
Collect Better Social Proof
If your current testimonials aren’t strong enough, make collecting better ones a priority. The post-trip email sequence covered in our email marketing for travel agencies guide is the most reliable mechanism for collecting detailed, high-quality reviews at scale.
Specifically: send an email 2–3 weeks after customers return from their trip, asking them to share their experience in their own words. Offer a direct link to your Google or Trustpilot review page. Follow up once if they don’t respond. Most happy customers are glad to help — they just need to be asked.
Step 5: A/B Testing — The Engine of Continuous Improvement
Quick wins deliver immediate results. A/B testing delivers continuous, compounding improvement over time.
A/B testing means running two versions of your landing page simultaneously — each shown to a different segment of visitors — and measuring which version generates more conversions.
What to Test (In Priority Order)
1. Headline The headline is the highest-leverage element — small changes produce large conversion differences. Test:
- Outcome-focused vs benefit-focused (“Your Dream Honeymoon, Perfectly Planned” vs “Maldives Honeymoon Specialists — Free Itinerary Within 24 Hours”)
- Specific vs general (“Maldives Honeymoon Specialists” vs “Luxury Honeymoon Travel Experts”)
- Question format vs statement format
2. Hero Image Test your own photography against professionally sourced alternatives. Test couple-focused images against destination-focused images for honeymoon pages. Test wildlife action shots against landscape shots for safari pages.
3. CTA Button Test button colour (your brand colour vs a high-contrast alternative). Test button copy (“Get My Free Itinerary” vs “Start Planning My Trip”). Test button size.
4. Form Length Test your current form against a version with 2 fewer fields. Test a single-step form against a multi-step version.
5. Social Proof Placement Test testimonials positioned above the form vs below the form. Test a single prominent testimonial vs a grid of three shorter ones.
A/B Testing Rules
Change one element at a time. If you change the headline, hero image, and CTA simultaneously, you can’t know which change drove the improvement (or caused the decline).
Run tests to statistical significance. A test with 50 visitors per variant is meaningless. You need at least 200–500 form views per variant before drawing conclusions. For lower-traffic pages, tests may need to run for 4–6 weeks.
Measure by conversion rate, not click-through rate. A headline that gets more clicks but fewer form submissions is not a winner.
Document every test. Keep a simple spreadsheet: what you tested, when, the result, and what you decided to do. This builds an institutional knowledge base of what works for your specific audience.
Tools: Unbounce (built-in A/B testing), Google Optimize (free, being phased out — check for alternatives), VWO, or Optimizely.
Step 6: Personalisation — The Advanced Conversion Lever
Once your landing page fundamentals are solid and you’re running regular A/B tests, personalisation is the next level of conversion optimisation.
Personalisation means showing different content to different visitors based on what you know about them — increasing relevance and therefore conversion rate.
Dynamic Text Replacement
Dynamic text replacement (DTR) automatically changes specific words or phrases on your landing page based on the search term a visitor used to find your ad.
Example: If someone searches “luxury Maldives honeymoon”, the headline reads: “Luxury Maldives Honeymoon — Planned by Specialists”
If someone searches “Maldives honeymoon package 2026”, the same page headline reads: “Maldives Honeymoon Package 2026 — Planned by Specialists”
The destination page is the same — but the headline is dynamically matched to the exact search term, increasing relevance and Quality Score simultaneously.
Tools: Unbounce and Instapage both support DTR natively.
Returning Visitor Personalisation
Show different content to visitors who’ve already been to your page. A visitor on their third visit to your Maldives honeymoon page is much further along in their decision than a first-time visitor — they need different messaging.
First visit: “Discover what a tailor-made Maldives honeymoon looks like” Third visit: “Still planning your Maldives honeymoon? Let us help you take the next step”
This level of personalisation requires a more sophisticated tool (HubSpot, Instapage, or a dedicated personalisation platform) but can significantly improve conversion rates for high-consideration travel purchases.
Step 7: Post-Submission Optimisation — Don’t Stop at the Form
Conversion rate optimisation doesn’t end when someone submits the enquiry form. What happens immediately after submission significantly affects whether that enquiry becomes a booking.
Optimise Your Thank You Page
Most travel agency thank you pages say “Thank you for your enquiry. We’ll be in touch soon.” That’s a missed opportunity.
A high-converting thank you page should:
- Confirm what happens next (reinforces the commitment they’ve just made)
- Set a specific expectation (“You’ll receive your personalised itinerary within 24 hours”)
- Offer immediate value (a link to a relevant destination guide, a video from your team, or your most popular blog post for that destination)
- Encourage social following (“While you wait, follow us on Instagram for daily destination inspiration”)
- Potentially present a secondary offer (a free destination guide download for a different destination they might be considering)
Optimise Your Confirmation Email
The immediate auto-response email is the first communication a new lead receives from you. It sets the tone for the entire relationship.
What a great confirmation email includes:
- Personal, warm acknowledgement of their specific enquiry
- Confirmation of your response timeframe (be specific — “within 24 hours on weekdays”)
- One piece of genuinely useful content related to their destination
- Your direct contact details (phone, WhatsApp, email) — remove friction for customers who want to call
As covered in our email marketing for travel agencies guide, the follow-up sequence triggered by this first email is what ultimately determines whether an enquiry becomes a booking.
Conversion Rate Benchmarks for Travel Landing Pages
Use these as reference points when assessing your current performance and setting improvement targets:
| Traffic Source | Average CVR | Good CVR | Excellent CVR |
|---|---|---|---|
| Google Ads (Search) | 2–3% | 4–6% | 7–10%+ |
| Facebook/Instagram Ads | 1–2% | 3–5% | 6–8%+ |
| Organic Search (SEO) | 1–2% | 2–4% | 4–6%+ |
| Email Campaigns | 5–8% | 10–15% | 15–25%+ |
| Remarketing | 3–5% | 6–10% | 10–15%+ |
If your conversion rate is significantly below the “Good” benchmark for your traffic source, focus on conversion killers and quick wins first. If you’re already at “Good” level, systematic A/B testing is the path to “Excellent.”
Your Conversion Rate Optimisation Priority Framework
Here’s the order in which to attack your conversion rate improvement:
Week 1–2: Diagnose
- Set up GA4 conversion tracking
- Install Hotjar or Microsoft Clarity
- Run PageSpeed Insights on every landing page
- Review heatmaps and session recordings
Week 3–4: Fix Conversion Killers
- Fix page speed issues
- Fix form technical problems
- Add CTA above the fold
- Fix any message mismatch
Week 5–6: Implement Quick Wins
- Rewrite headline to be outcome-focused
- Change submit button copy
- Add “what happens next” statement
- Move strong testimonial adjacent to form
- Add prominent phone number
Month 2: Structural Changes
- Reduce form field count
- Test multi-step form
- Create destination-specific pages if not already done
- Improve social proof quality and placement
Month 3+: Systematic A/B Testing
- Headline test
- Hero image test
- CTA button colour test
- Form length test
- Social proof placement test
Ongoing: Personalisation and Refinement
- Implement dynamic text replacement
- Optimise thank you page and confirmation email
- Continue monthly A/B testing cycle
Common Conversion Rate Optimisation Mistakes ❌
1. Making changes based on opinion rather than data “I think the blue button looks better” is not a reason to change the button. Use heatmaps, session recordings, and A/B test data to make decisions.
2. Testing multiple elements simultaneously If you change the headline, image, and form in the same week, you can’t attribute any conversion rate change to a specific element. Test one thing at a time.
3. Ending tests too early A test with 50 visitors per variant is not statistically meaningful. Wait for at least 200–500 form views per variant before concluding a test.
4. Optimising for clicks instead of conversions A higher CTR on your CTA button is only valuable if it leads to more form completions. Always measure by conversion rate, not by intermediate metrics.
5. Fixing the landing page while ignoring the follow-up A landing page that converts at 8% is only valuable if the enquiries are followed up promptly and effectively. CRO and sales process optimisation go hand in hand.
6. Stopping after one improvement Conversion rate optimisation is not a one-time project — it’s an ongoing discipline. The agencies with the highest conversion rates are the ones that test something new every month.
Final Thoughts
Increasing your landing page conversion rate is the most capital-efficient improvement you can make to your travel agency’s marketing. It makes every pound of ad spend more productive, every piece of SEO content more valuable, and every social media follower more likely to become a customer.
Start with measurement. Fix the conversion killers. Implement the quick wins. Optimise your form. Test systematically. And never stop improving.
The gap between a 2% and a 5% conversion rate isn’t luck — it’s the result of deliberate, data-driven optimisation applied consistently over time. Start today and you’ll be measuring the impact within weeks.
For the complete picture of building high-converting travel agency landing pages, explore our full series — starting with landing page best practices for travel agencies, how to write landing page copy for travel, and landing page design tips for travel agencies. And for the complete travel agency digital marketing strategy, head back to our Complete Digital Marketing Guide for Travel Agencies. 🌍